DIY Coconut Bowls: Craft Eco-Friendly Bowls Cheaper Than Buying
In a world increasingly focused on sustainability and mindful living, the allure of crafting your own eco-friendly items is more appealing than ever. What if we told you that one of nature's most versatile fruits offers a fantastic opportunity to create beautiful, functional, and completely natural bowls right in your own home? Forget single-use plastics or expensive store-bought alternatives; we’re talking about homemade coconut bowls – a testament to resourceful living that’s both kind to your wallet and the planet. This guide will walk you through transforming humble coconut shells into stunning pieces of art and utility, demonstrating how you can craft these unique items, often cheaper than buying, and even create other valuable products like
homemade coconut shreds and chips from the same source.
Why Craft Your Own Coconut Bowls? The Eco-Friendly & Economical Choice
The appeal of DIY coconut bowls extends far beyond just a fun crafting project. They embody a trifecta of benefits: environmental responsibility, economic savings, and personal satisfaction.
Firstly, opting for homemade coconut bowls is a powerful step towards reducing waste. Coconuts are incredibly resourceful, providing water, meat, oil, and more. Yet, their sturdy shells are often discarded. By upcycling these shells, you divert them from landfills, transforming what would be waste into a valuable, reusable item. This aligns perfectly with a zero-waste lifestyle, making them a fantastic choice for the environmentally conscious.
Secondly, the cost-effectiveness is undeniable. While beautiful coconut bowls can be purchased from artisan shops or online, they often come with a significant price tag. The primary "ingredient" for a DIY bowl is simply a mature coconut, which is widely available and affordable. Even when accounting for a few basic tools, the overall cost of crafting your own bowls is almost always significantly lower than buying them pre-made. This makes sustainable living accessible without breaking the bank.
Beyond the practicalities, there’s immense satisfaction in creating something with your own hands. Each handcrafted coconut bowl will possess a unique character, bearing the marks of nature and your personal touch. They are 100% natural, free from BPA, plastics, synthetic materials, and other toxins often found in manufactured goods, making them a safe and healthy option for food storage or serving. Moreover, these unique, organic pieces make incredibly thoughtful and impressive gifts for friends and family – a testament to your creativity and care.
Gathering Your Tools and Choosing the Perfect Coconut
Embarking on your coconut bowl crafting journey requires just a few readily available items. The quality of your raw material and the right tools will set the stage for success.
Selecting Your Mature Coconut
The foundation of a great coconut bowl is a great coconut. Look for *mature coconuts* – these are typically the brown, hard-shelled variety, not the young green coconuts primarily used for water. A mature coconut will have a thicker, more durable shell, ideal for carving. Ideally, choose coconuts with slightly flatter ends, as this can provide better stability for your finished bowl. While a perfectly round shape is aesthetically pleasing, don't worry too much about minor irregularities; these add to the unique charm of a natural product. Also, ensure the outer fibrous husk isn't excessively thick, making the shell harder to access.
Essential Tools for Your DIY Journey
You don't need a workshop full of specialized equipment. Most of these items can be found at local hardware stores or online:
*
A Small Handsaw: This is arguably the most crucial tool for a clean, even cut. While other methods exist for opening coconuts, a small hand saw (like a junior hacksaw or a coping saw) will yield the best results for a perfectly halved bowl. It’s an inexpensive investment that makes a big difference.
*
Coarse and Medium Grit Sandpaper: For smoothing the edges and surfaces. You’ll want both a coarser grit (e.g., 80-120 grit) to remove initial rough spots and a finer grit (e.g., 220 grit) for a silky-smooth finish.
*
A Sturdy Brush or Cloth: For cleaning the coconut and applying finishing oils.
*
Food-Safe Finishing Oil or Wax: This step is vital for protecting your bowls and making them food-safe. Excellent options include:
*
Linseed Oil: A traditional choice for wood finishing, it provides a durable, food-safe seal.
*
Walnut Oil: Similar to linseed, also food-safe, but be mindful of nut allergies if gifting.
*
Extra Virgin Coconut Oil: An accessible and natural choice, though it may require more frequent reapplication.
*
Food-Grade Mineral Oil with Beeswax: Often recommended for items that will be washed frequently, as this blend offers superior waterproofing and durability.
* For decorative bowls not intended for food, any standard DIY store lacquer or varnish will suffice.
Step-by-Step Guide: From Coconut to Crafted Bowl
Now, let's get down to the hands-on process of transforming your coconut into a beautiful bowl.
1. Safely Halving Your Coconut
This is the most critical step for shaping your bowls.
*
Prepare Your Workspace: Place the coconut on a kitchen towel or a non-slip surface to prevent it from rolling. Hold one end of the coconut firmly, ensuring your hand is well away from the cutting path of the saw.
*
Begin Sawing: Gently push the small handsaw back and forth, making a clean, straight cut right in the middle of the coconut. Precision here is key for creating two equally sized bowls. Take your time; rushing can lead to uneven cuts.
*
Drain the Water: Once you've sawn about an inch or two into the shell, you’ll notice a small gap. Carefully turn the coconut over and lightly pull at the cut to allow the coconut water to drain into a bowl. Don't waste this delicious and nutritious liquid – it's perfect for drinking or adding to smoothies!
*
Complete the Cut: Continue sawing all the way through until the coconut separates into two halves.
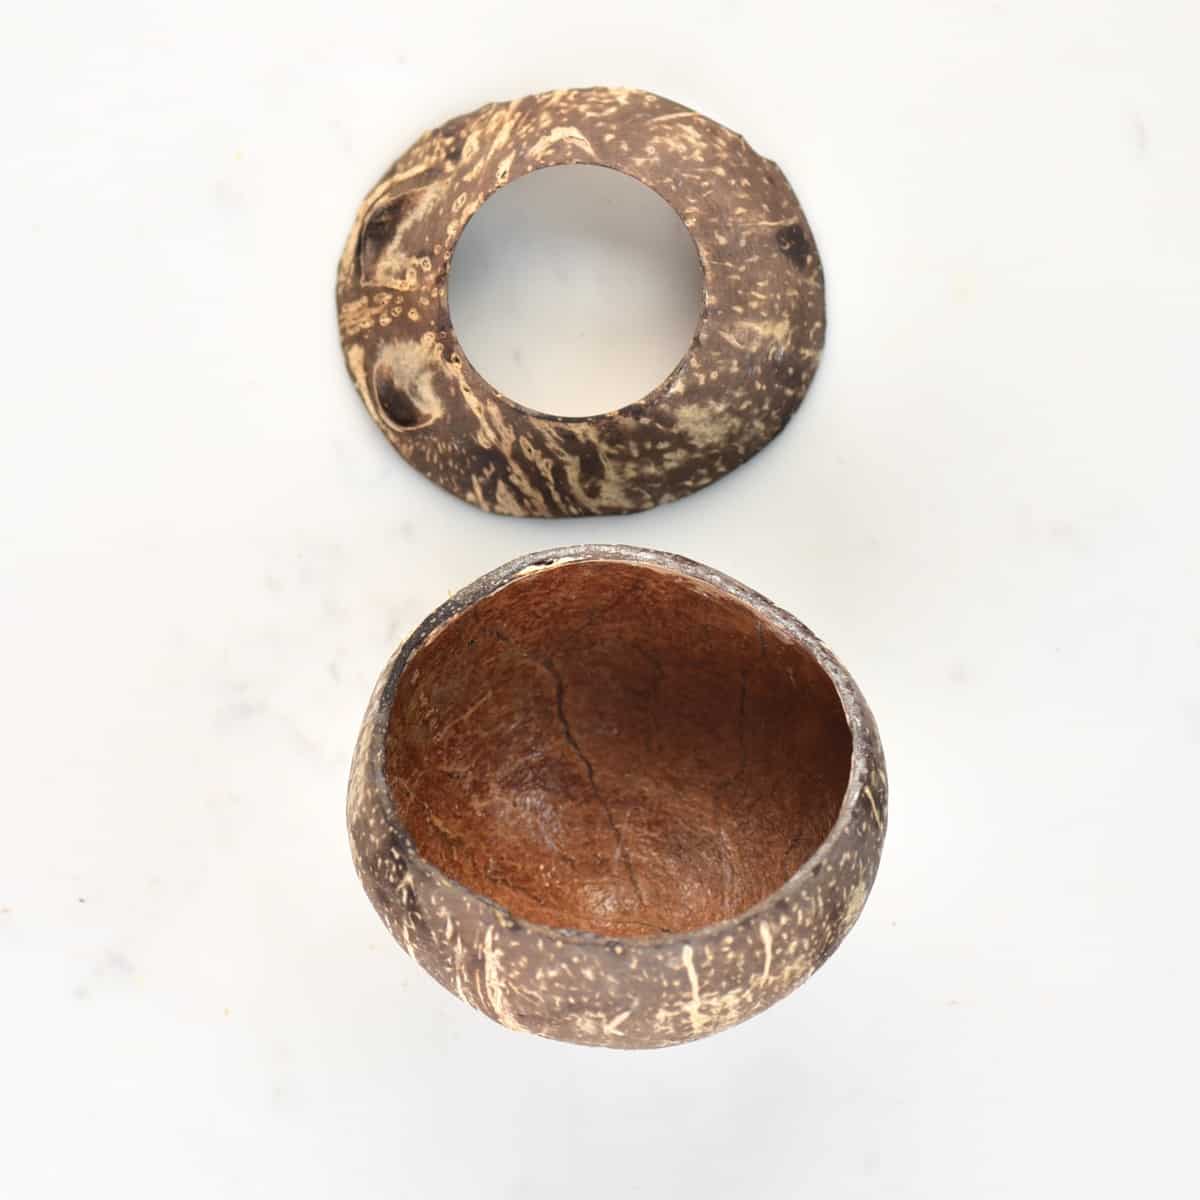
2. Cleaning and Preparing the Shell
Once halved, you'll need to clean out the coconut meat and any remaining fibers.
*
Remove the Meat: Use a sturdy spoon, butter knife, or even a screwdriver to carefully pry out the coconut meat from the inside of each shell. This meat can be saved for various culinary uses (more on this below!).
*
Initial Cleaning: Scrape away any lingering bits of meat or loose fibers from the inside of the shells. You can use a brush and some warm water to ensure they are thoroughly clean. Let them dry completely before moving to the next step.
3. The Art of Sanding: Achieving Smooth Perfection
Sanding is where your coconut shell truly transforms into a polished bowl.
*
Start Coarse: Begin with your coarse-grit sandpaper (80-120 grit). Focus on the cut edges of the bowl first, smoothing out any rough or sharp spots. Then, lightly sand the outer surface to remove any stubborn fibers or imperfections. The goal is to achieve a relatively even and smooth surface.
*
Refine with Medium Grit: Switch to your medium-grit sandpaper (around 220 grit). This will further refine the surface, removing any scratches left by the coarser paper and preparing it for finishing. Sand both the cut edges and the exterior until the bowl feels smooth to the touch. You can even lightly sand the inside if desired, though the natural texture is often beautiful as is.
*
Dust Off: After sanding, wipe down the bowls with a clean, dry cloth to remove all dust.
4. Finishing Touches: Sealing and Food Safety
This final step protects your bowls and makes them safe for use.
*
Choose Your Finish: Select one of the food-safe oils or waxes mentioned earlier (linseed, walnut, coconut oil, or mineral oil/beeswax blend).
*
Apply Generously: Using a clean cloth or brush, apply a generous layer of your chosen finishing agent to both the inside and outside of the coconut bowls. Ensure even coverage.
*
Allow to Absorb: Let the oil soak into the shell for several hours, or even overnight. The coconut shell is porous and will absorb the oil, darkening slightly and enhancing its natural grain.
*
Wipe Excess and Buff: After sufficient absorption time, use a clean, dry cloth to wipe off any excess oil. Buff the bowls gently to a subtle sheen.
*
Curing (If Applicable): For linseed or walnut oil, a curing period might be necessary to allow the oil to fully harden and seal the surface. Follow the instructions for your specific product. Multiple thin coats can also be applied for extra durability, allowing drying time between each coat.
Beyond the Bowl: Maximizing Your Coconut's Potential
One of the most exciting aspects of DIY coconut crafting is the ability to utilize every part of this incredible fruit. Once you've extracted the meat for your bowls, don't let it go to waste! The same mature coconut that provides you with beautiful bowls can also yield fresh coconut meat, which can be easily transformed into delicious
homemade coconut shreds and chips. This truly embraces a zero-waste philosophy, allowing you to create your own **coconut shreds, chips, and bowls** from a single fruit.
Making your own shredded coconut or coconut chips at home is surprisingly simple and ensures you have fresh, preservative-free ingredients for baking, snacks, or smoothie bowls. This holistic approach to coconut utilization is not only economical but also deeply satisfying. For a comprehensive guide on how to make these other fantastic coconut products, check out our article:
Maximize Your Coconut: Homemade Bowls, Shreds, and Chips DIY.
Caring for Your Handcrafted Coconut Bowls
To ensure your DIY coconut bowls last for years, proper care is essential:
*
Hand Wash Only: Never put your coconut bowls in a dishwasher. The high heat and harsh detergents can damage the natural shell and finish.
*
Mild Soap and Water: Wash them with warm water and a mild dish soap.
*
Dry Immediately: Do not let them soak in water. Dry them thoroughly with a towel immediately after washing.
*
Re-Oil Periodically: To maintain their luster and integrity, re-oil your bowls every few months (or more frequently if used often) with your chosen food-safe oil. This helps prevent the shell from drying out and cracking.
*
Avoid Extreme Temperatures: Do not put them in the microwave, oven, or refrigerator. Extreme temperature changes can cause cracking.
Crafting your own DIY coconut bowls is a rewarding endeavor that connects you with nature and promotes a more sustainable lifestyle. With just a few simple tools and a mature coconut, you can create beautiful, functional, and eco-friendly pieces that will serve you for years to come, all while saving money and reducing waste. Enjoy the journey of bringing these natural treasures into your home!